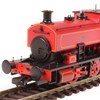
Andrew Barclay 0-4-0ST - Formations Guide
By Jack Morgan - Wednesday, 06 February 2019
We've produced this diagram to showcase 12 realistic rakes you can run with an Andrew Barclay locomotive.
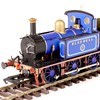
SECR P Class 0-6-0T - Formations Guide
Formations diagram for the SECR P Class 0-6-0T locomotive, showcasing 11 realistic rakes you can produce with your models.